Thursday, April 7, 2016

The One With the Friends Baby Shower

For the last 15+ years, my sister has had a special way of communicating. She'll insert an applicable quote from Friends into a conversation, smile a bit, and wait to see who quotes her back. Many times, if we're in a conversation together, she'll drop the quote, smile at me, I catch her eye, and we wait together for other people to get it. It's a fun thing to do. "Friends" is definitely part of her vernacular.

So when it came time to throw her a baby shower in anticipation of the arrival of my soon-to-be-born niece, I thought, "how fun would it be to do a Friends theme?!" And then I (foolishly) thought, "well, it can't be that hard." Off to Pinterest I went, because surely someone else had done a baby shower with a "Friends" theme.

Nada. Couldn't find a single baby shower, but I found tons of bridal showers. So I thought, "well, guess mine will be the first." So here we go!

The basic thought was this: let's turn the room into Central Perk! Which we (kind of) did. I bought a roll of plastic brick wall sheeting from Amazon, and a roll of black sheeting from Hobby Lobby. Since we could really only decorate one wall, that's the wall we decided would be the "picture" wall. A poster of the original "Central Perk" finished off the wall. We also combed Pinterest for any screenshots of Friends with references to babies or showers, and posted those screenshots all over the place.
Notice the chick and the duck!

She had to "win" her shower in a mock-game of The Price is Right, which was a lot of fun. Maybe I'll do a post about that next. Anyways, the aforementioned black sheeting was also used to cover the doorway leading into her shower. The door itself was covered with a lilac plastic tablecloth from Hobby Lobby, and one of my bigger yellow frames which read, "The One With Suzanne's Baby Shower."


We made a "coffee spot" at the end of the wall, complete with Gunther's picture looming over it. While I would have preferred it to be bigger, it still made people smile.


The biggest problem/probably most important part was the iconic yellow frames. These were a pain in the butt, mostly because I am so not a crafty person! I tried to make the paint thicker, I tried to paint the whole thing... all turned into a mess. I finally ended up mixing Elmer's glue with the right color paint, then squirted the concoction into swirls on pre-cut yellow frames made out of yellow foam core (which my dad lovingly cut out on his scroll-saw or something like that, bless his heart. Anyways, when someone asked how I did the frames, and I explained the ridiculous process, they asked, "why didn't you just use puff paint?" PUFF PAINT!!!! It would have been soooooo much easier! So, you know, live and learn.


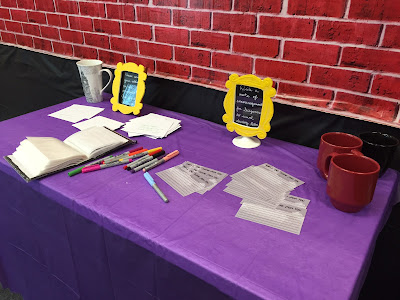
The smaller frames were used on the activity tables. I'm not a big fan of normal shower games, so we didn't do any of those. I had little notes in the frames like "write something funny on a diaper," etc. I just used double-sided tape to stick the frames to any stray 4x6 frames I had lying around (there were tons!), and that was that.


My sister (Suzanne) wanted little notes of encouragement written to her, so I grabbed a 4x6 photo album, painted it black, and then added her name above a screenshot of the "Friends" logo from the credits (note: I found it online, I did my best to respect all copyrights!). There's a "Friends" font that's really spectacular, and worked really well.


The theme of the shower was "We'll be there for you." So I used my last yellow frame and stuck it to a 16x20 canvas that I pre-painted in purple. The theme was written across, and people were asked to sign it. Whether she'll ever hang it is a mystery, but I wanted her to have a memento of her shower that was more than baby clothes/blankets. Update literally five minutes after I posted this originally: it's hanging in her nursery. Success!


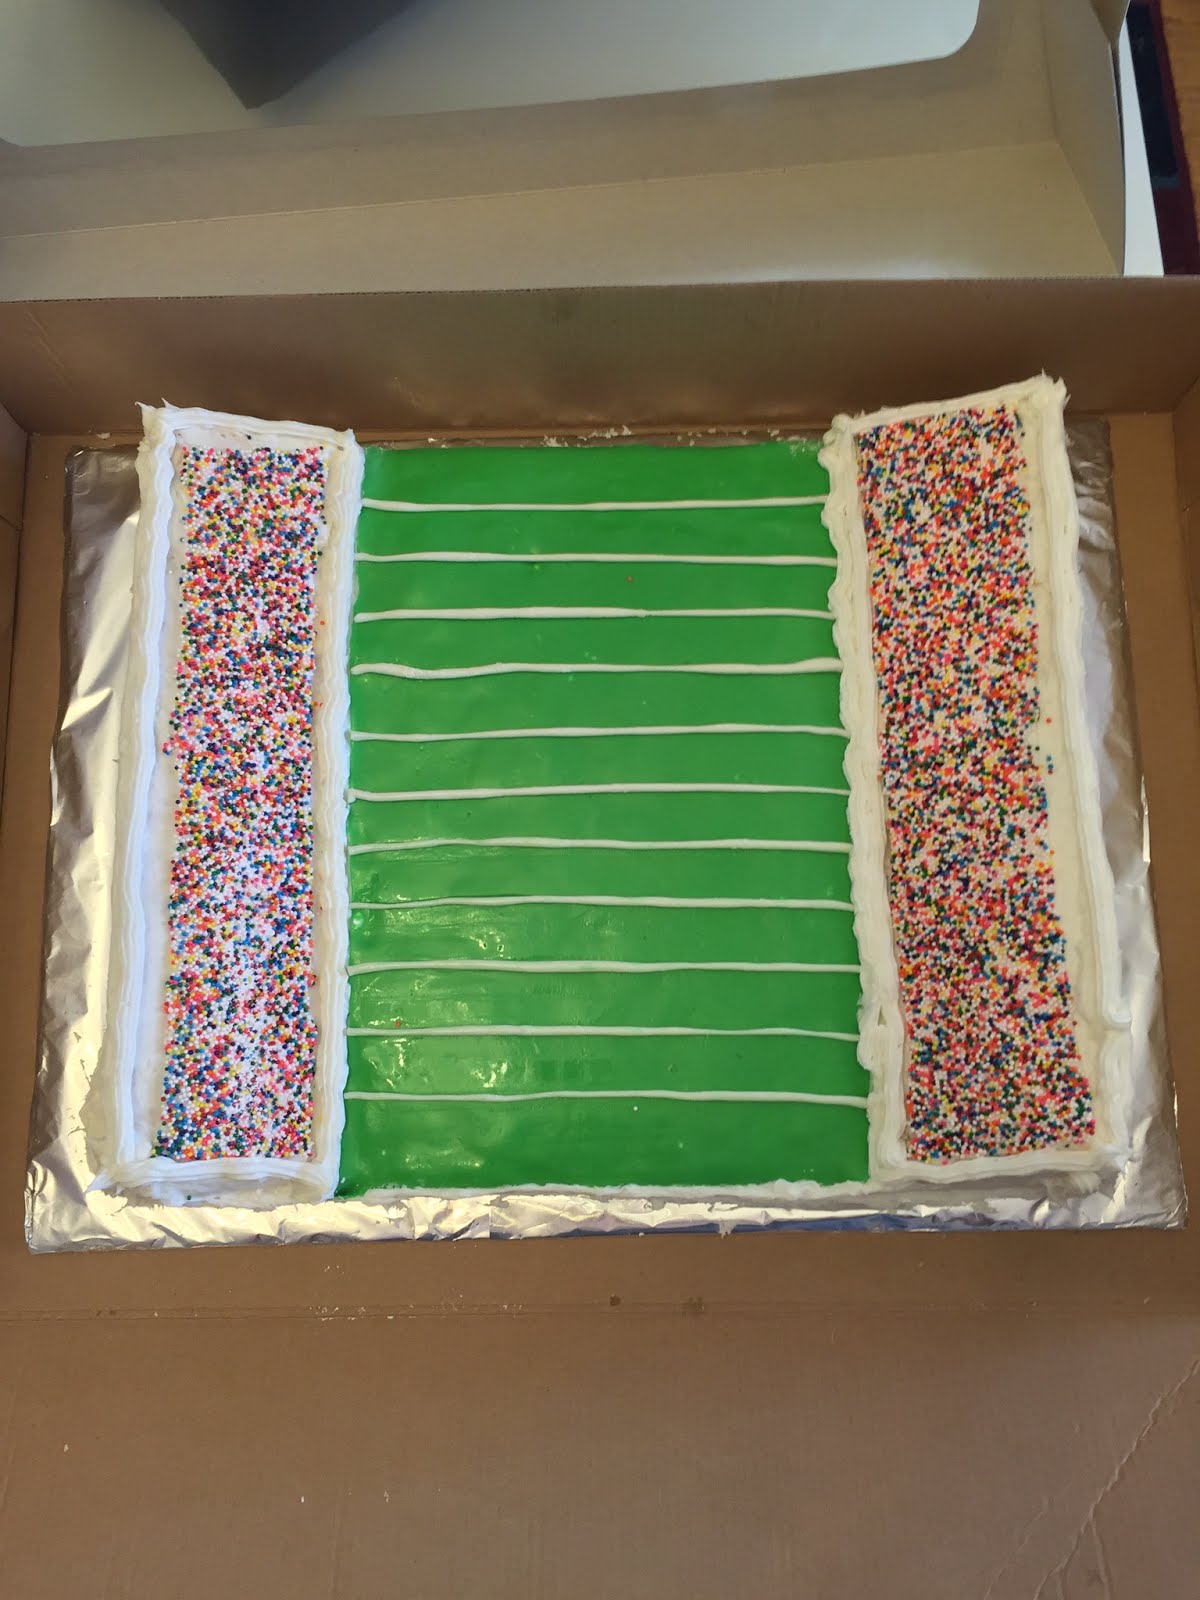
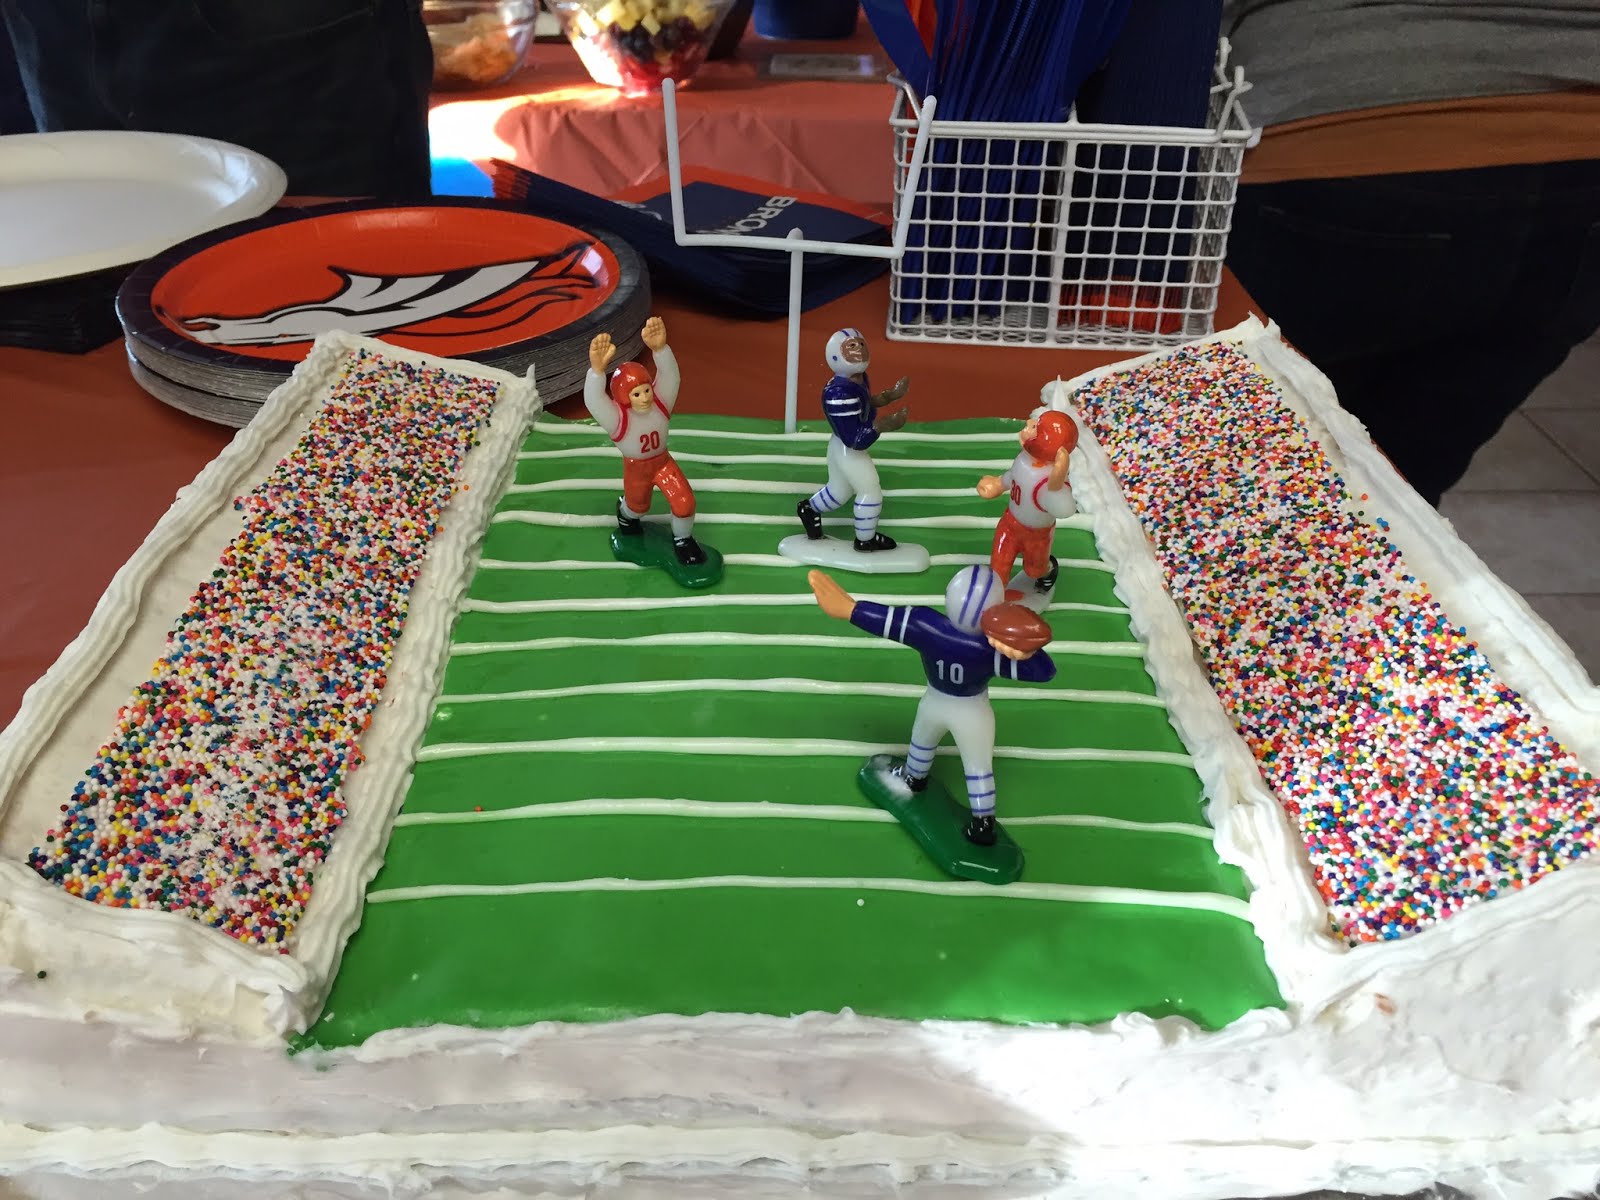
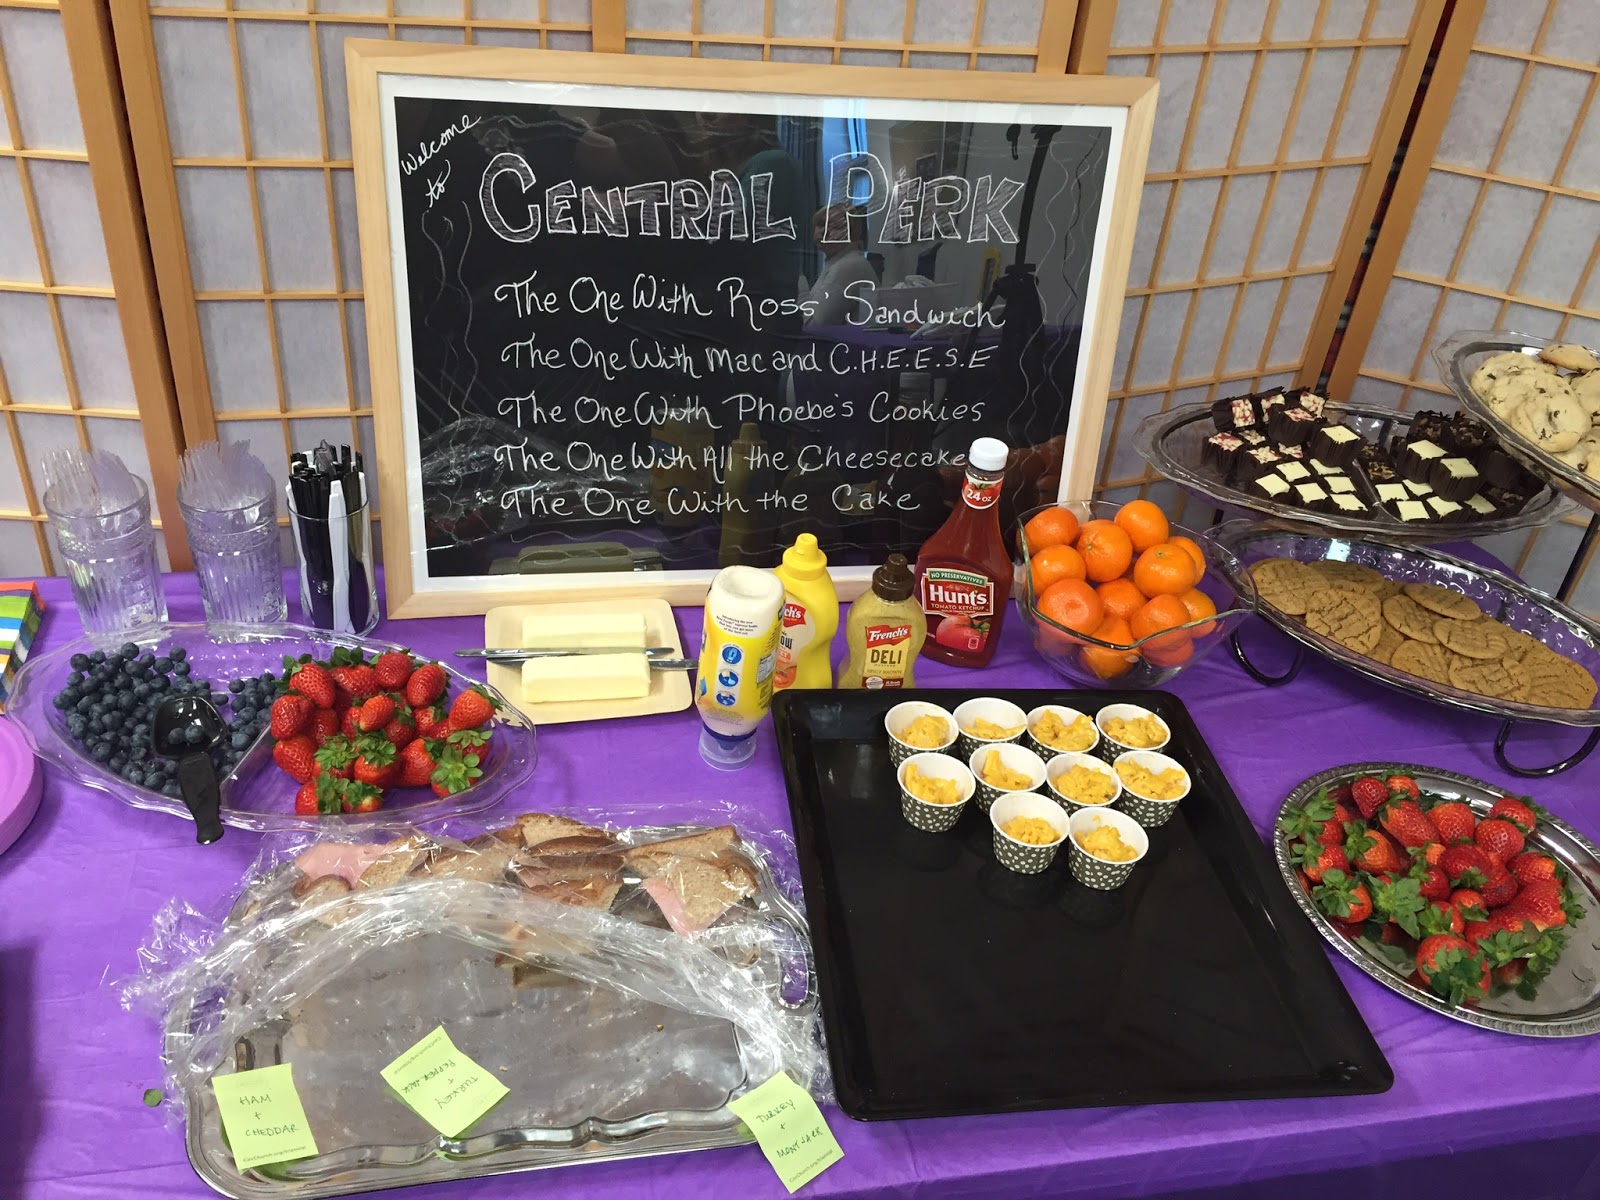
And then there was the food. Ah, the food. I was struggling with the menu until one day when I was looking at an episode list. I realized that lots of episodes are named after food! I culled them down to doable things, then wrote the episode names on a piece of chalkboard paper in chalkboard paint. It happened to be most of my sister's favorite foods as well, which was an added bonus. The cake was not my favorite, because I was working on it when I had a crazy fever/cold/plague, but it was okay and people seemed to like it.


And there you have it! Hopefully still the first Pinterest Friends baby shower. I had a ton of fun, she loved it, I'd say it was a success.

Monday, February 22, 2016

Super Bowl Stadium Cake


I'm from Colorado, and I admit it: I'm a total fair-weather Broncos fan. When they're doing well I'm really into it, but when they're losing I'm on Pinterest while everyone else screams at the TV. But, when they won the AFC Championship in January, you can bet that we were planning a Super Bowl party as soon as the score went to "Final." The request was for me to "make something Pinterest-inspired, because she likes that."

A little intimidating, right? But hey, I'm up for a challenge. So I hopped onto my favorite site (sorry, Netflix) and searched for anything Super Bowl related. I finally stumbled across this original post at Coolest Birthday Cakes. I thought, "sure, that's a cinch! Totally easy." Yeah, those words would come back to haunt me. 

The Process:
So if you look at the original post, you can see that there's some instruction, but very little. My original plan was to dye the cake batter orange and blue for a Broncos theme, which I did. Unfortunately, it took forever and a day to get the orange just right. It would have been soooooo much easier had the Broncos' colors been blue and peach. But possibly that's less intimidating? I digress. Because it took about 6000 drops of gel coloring, I beat the batter too much and the cake barely rose. 

Long story long, that cake ended up going into a blue and orange (at least it was orange!) trifle that I took to church. And that left me with exactly no back-up cakes. Since I bemoaned the lack of instructions on the original post, here are the first steps that I took. If you have a better way of doing things, please comment and let me know!
  1. Grease and flour the heck out of two 9x13 pans, making sure they have straight edges (instead of slanted).
  2. Bake two cakes, praying feverishly that both turn out okay.
  3. Do a little happy dance when both cakes turn out just fine (well, even!)
  4. Flip them over and line the pan with a little plastic wrap, then freeze the cakes for at least 6 hours.
  5. Cut one of the cake into thirds, length-wise.
  6. Re-freeze the thirds to make sure they'll be fine.
  7. Put the two end pieces on either side of the 9x13 and do a light crumb coating in between/around to make sure everything sticks together well. The middle cake will be your playing field, and the sides will be your stadium.
  8. Cut the middle third on a diagonal, making two triangular-shaped pieces. Hint: if you're like me and are too worked up to do this by yourself because it's 11:30pm the night before the Super Bowl and you have no backup cakes and no time to fix it if something goes wrong, have your dad do this. 
  9. Quickly flip the triangular pieces on top of the two sides, making sure both pieces are facing the field at a 45-degree angle (woohoo, I just used geometry in real life!).
  10. Do another crumb coating on top of the whole cake.

Okay, so that's the assembly part. And yes, I am a dramatic person, especially when I'm baking late at night. But here's the part I haven't told you yet - this was also my first foray into fondant. Which I (stupidly) thought would be easy. Not so much! Anyways, I followed this recipe from Cute DIY Projects and to be fair to them, when I say I "followed it" I mean "looked at it briefly and ignored all their hints." Anyways, I made a little green fondant and a little white fondant. It all ended up working out.

So the next day (Super Bowl Sunday!) I frosted the whole cake pretty well, then rolled out the green fondant to the size of the field cake. I put it on and got it... well... mostly smooth. 85%. Still counts. Then I rolled out the white fondant into small strips the size of the stadium stands, and put a little bit of buttercream on top. Then I sprinkled about 8000 (rough estimate) multicolored sprinkles on it to look like fans. It helped give me that really square look that I wanted for the stands, so that was nice. The fondant stretched a bit when I put it on, but I think it was still easier than trying to get the sprinkles on in a square a different way. With time running out before we had to leave, I quickly rolled tiny strings of white fondant to be the yard lines. Perfect? Heck no. Worked? Yeah, mostly. After piping around the sides I declared it good enough and setted in to watch the Broncos win the Super Bowl. Woohoo!


The Result:
Not gonna lie, I got a lot of "ooohs" and "ahhhhs" when I took it out of the box. Everybody seemed to really like it, and when we put the little figurines on top (that we already had) it seemed to complete the look. Most people that commented said "I can't believe you made this, I thought it came from a store!" Still trying to decide if that's actually a compliment, but I'm going to take it as such.

And there you have it: the actual process of making a really time-consuming stadium cake. I wish I had done some things differently (the yard lines bother me a bit, and the fact that neither team name is in the end zone), but for the most part I was happy with it. I'm not the world's best cake-decorator, so I think this is helping my "skills." I'm still pretty happy with the result - looking forward to next year's game! 


Monday, November 2, 2015

Acer Chromebook Review


I'm a die-hard Apple fan. I won't even look at anything else, much less consider buying it. Except... I'm a die-hard Apple fan who works for a nonprofit, is saving up to buy a house, and has no extra income to speak of right now. So when my beloved MacBook Pro showed signs of biting the dust rather soon (always a bad thing when it literally won't even connect to the Internet anymore), I knew what I wanted: I wanted an 11-inch MacBook Air. The 256gb SSD refurbished is around $900, which I thought was okay. But I also want a normal iMac, with a stinkin' big hard drive so I don't run out of space for the foreseeable future.

I promise, I'm about to get to the Acer review. I started consulting on the side recently, and literally only needed a computer with a little bit of a hard drive that would be able to connect to the Internet. Not too much to ask, right? The problem was I needed it right away, and didn't have time to save up for an Air. I hadn't been super familiar with Chromebooks, but thought I'd look them up on Amazon anyways.

When I logged onto Amazon and saw the Acer Chromebook 11, I thought there was a pricing mistake. Seriously, less than $175 for a computer? What the heck? I looked up the specs for the MacBook Air and saw that the Chromebook was startlingly similar in most ways, except for the fact that the Chromebook had 2gb of RAM instead of 4, like the MacBook. It also only has a 16gb SSD, but comes with Google Drive (more on that below) I bought it (with more than a little guilt over buying a non-Apple product!) and have been using it for almost a month.

The Good:
Seriously, this thing is a 90%-er. It absolutely rocks. It's ridiculously light, and feels good/stable. It's made out of plastic, which I was initially concerned about, but I've found out it wipes off remarkably well. It's also impressively fast. It loads web pages easily and quickly (for the most part, more on that below), and the battery life is simply incredible. I was home all day yesterday recovering from a wisdom tooth pull (ugh), and I used it for hours upon hours without it failing. The battery also recharges very quickly, which has come in really handy.

The keyboard has a good feel, and clicks nicely, which may sounds stupid but I'm really picky about my keyboards. It has a built-in webcam that's decent (though maybe nothing to write home about), and my family has had fun taking funny pictures with the camera and built-in software.

Features!

I'm also impressed at all the features - it has two USB 3 ports, headphone jack, SD card reader, and even an HDMI port. Pretty impressive for a sub-$200 computer! Also, it should be noted that the speakers are just fine - a little tinny, but I like the speakers right below the computer. It amplifies them when on a hard surface, but when on a soft surface (half the time I'm typing on a couch or a bed), it's significantly muted.

Like I said, I mostly use it for the Internet, and that does a pretty good job most of the time. I should also point out that it came with a lot of extras - 100gbs of Google Drive for 2 years, 12 Gogo air passes, and a 60-day trial of Google Music. Because I bought it on Amazon, I also got a year of Amazon Unlimited Cloud Storage for a year (which is apparently a $59.99 value)

The Neutral:
There are definitely some things I've had to get used to. The 16gb hard drive is smaller than my phone, so I'm constantly cleaning things out that I download and putting them on the Google Drive, or Dropbox. It's basically another step or two to save things, but it's not usually a huge deal.

Because I'm used to a glossy screen, and this is matte, it took me a good week to get used to it without hurting my eyes. It's a good screen, and fine resolution, but I feel like the resolution doesn't come through in the matte screen. Not a huge deal, but again, something to consider.

I'm used to utilizing lots of different browsers (Chrome, Firefox, and Safari), and it's odd to me to only have one. Most of the time I don't really notice, but it was something that was jarring at first.

The Bad:
Remember how I mentioned it only has 2gb of RAM? I didn't think it was going to be a big deal, but if I have more than two browser tabs open the thing slows down considerably, or even locks up. There were a few times last week when it would freeze and restart with no warning, which was really annoying. It turns out though that I hadn't updated it in a bit and that seems to have solved the issue. Still, if you want to have Netflix or Spotify running in the background, you can only have one other tab open, tops.

This is a stupid thing to include in the "Bad" column, and I know it, but the thing has no caps lock! Instead of a caps lock button, it has a "search" button. Which is fine, I suppose, for the people who want to use the search, but I can't tell you how many times I've tried to caps lock and have ended up typing in the search bar. Only 10 seconds, tops, but takes me out of my productivity mode.

The Bottom Line:
Like I said, this thing is a 90%-er. There are some workarounds that need to be done if you're used to doing everything on one computer (for instance, I now edit photos on my phone), but if you're looking for a really inexpensive computer that will do most things you need, I think it's great. I'm planning on using this for the foreseeable future, and will only get the iMac in the future (still need someplace to store all my stuff!). It's a great alternative to a tablet, or in addition to a tablet, and it's pretty fun to use. All in all, I'd highly recommend it.

To Buy: Amazon, Acer